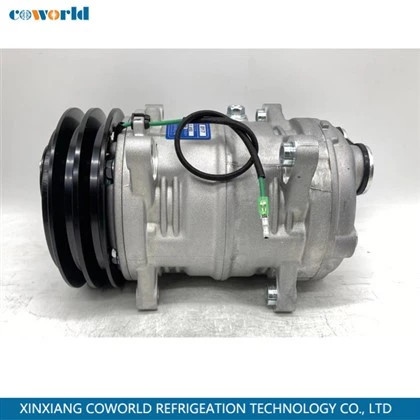
Electric Refrigeration Unit Hey there, if you’re reading this, chances are you’re either gearing up to install an outdoor refrigeration unit for your shop, warehouse, or maybe even a food truck— and let’s be real, pulling this off outdoors isn’t as simple as plugging in a fridge in your garage. I’ve been supplying refrigeration units for over 10 years now, and let me tell you, I’ve seen every mistake in the book: units fried by extreme cold, rusted out by rain, even ones that broke because someone stuck them under a tree that drops all kinds of gunk. So today, I’m spilling all the real, on-the-job precautions I preach to every customer, no fancy jargon, just the stuff that actually keeps your unit running long-term. First off, let’s cut the crap— outdoor installs come with way more variables than indoor ones, so skimping on prep work? That’s a recipe for costly breakdowns. I’ve had customers call me at 2 a.m. when their walk-in cooler died mid-harvest, and half the time it was something they could’ve fixed before even uncrating the unit. Let’s start with the most obvious (but most overlooked) one: site selection. I know, I know— “just put it somewhere with space” sounds easy, but it’s not. First, drainage. If your unit’s sitting in a puddle after rain or snowmelt, that’s a disaster. Water’s going to seep into the electrical components, the compressor, you name it. I always tell folks to pick a spot that’s at least 6 inches higher than the surrounding ground, or lay down a concrete pad that slopes 1/4 inch per foot away from the unit. No asphalt, by the way— asphalt breaks down in extreme heat, it softens, and your unit can shift, which messes up the alignment of the refrigerant lines. And for the love of all things cold, don’t tuck it next to a wall or under an overhang without leaving space for airflow. Condensers need to breathe, right? If they’re crammed in a corner, they can’t expel hot air, so the unit works twice as hard, burns out faster, and your electricity bill goes through the roof. I usually recommend at least 2 feet of clearance on all sides— front, back, left, right, top. Even if you think your side yard is small, squeezing a condenser in there is a bad call. Another site no-no: direct overhead obstructions. Trees are pretty, but sap, leaves, bird droppings— all that stuff clogs the condenser fins, which again, kills airflow. I once had a customer put their unit under an oak tree, and by fall, the fins were so clogged with acorns and leaves that the compressor locked up. They ended up needing a whole new unit, not just a cleaning. Rule number one for site: flat, well-drained, airy, and free of overhead gunk. Next up, weather protection. Wait, I’m not talking about just rain— I mean every extreme weather thing your area throws at you. If you’re in a place that gets tons of sun (like Arizona or Texas), you can’t just leave the unit out in direct midday heat. The heat of the sun radiating down on the top of the unit makes the condenser work way harder, even if it has clearance. The fix? A simple, open-air canopy, not a closed box— closed boxes trap heat, so that’s worse. A canopy that’s 1-2 feet taller than the unit, made of metal or heavy-duty plastic, with sides that are open or only have mesh to keep rain off but let air circulate. But if you’re in a cold climate? Winter brings its own problems. If temperatures drop below freezing, the refrigerant lines can get too cold, and actually, the compressor might not start up. Also, snow can pile up around the base of the unit and block airflow, same as leaves. I tell customers in cold zones to install a snow fence around the unit, at least a foot away, to keep drifts from building up. And don’t forget: if you ever have to shut the unit down for a while in winter, don’t just leave it off— drain the water lines to prevent freezing, and cover it with a breathable cover (not a plastic tarp, that traps moisture and causes rust). Wait, speaking of rust— that’s a big one for metal units. Even stainless steel isn’t invincible if it’s exposed to salt air (if you’re near the coast) or constant rain. So what’s the fix? Make sure the unit’s galvanized, first off— all the units I supply come with a heavy galvanized exterior, but if you’re using an older one or a budget model, check that. And then, regular maintenance: spray down the exterior once a month with a mild detergent to get rid of salt or debris, especially if you’re near the ocean. Don’t use high-pressure washers, though— that can bend the delicate condenser fins, which ruins airflow. Use a regular garden hose on low pressure. Now, electrical safety— this is non-negotiable, and I see so many people cut corners here. Outdoor units need a dedicated circuit, no sharing with a pump, a light, or anything else. If you plug it into an extension cord? That’s a no-go too, unless it’s a heavy-duty, outdoor-rated extension cord rated for the exact amperage of your unit. Regular indoor cords can overheat, cause fires, or drop voltage, which makes the compressor run inefficiently. Also, the disconnect switch— every outdoor unit needs a weatherproof disconnect switch within sight of the unit, so if you need to shut it off for maintenance, you don’t have to fumble with a wet electrical panel. And ground fault circuit interrupters (GFCIs)? Absolutely, for any unit that’s within 10 feet of the ground, to prevent shock if it gets wet. Pro tip here: if you’re not super handy with electrical work, don’t do this yourself. I’ve seen people wire their units wrong, and within a week, the compressor was dead. Better to pay a licensed electrician $200 upfront than $1,500 for a new compressor. Next, refrigerant line installation— this is the part that can make or break the unit’s performance, especially outdoors. The lines that run between the compressor and the evaporator (inside your walk-in or whatever) can’t be left hanging out in the sun or cold, right? Extreme temps affect the pressure in the lines, so you need to insulate them with closed-cell foam insulation, and then wrap that in a weatherproof tape to keep moisture out. Also, make sure the lines are sloped slightly (like 1/8 inch per foot) toward the compressor, so any condensation or oil can drain properly. If they’re not sloped, you get oil buildup in the lines, which makes the compressor work harder and eventually fail. And don’t kink the lines— even a tiny kink can restrict refrigerant flow, leading to uneven cooling. I always have the techs I work with (we offer free consultation on installs, by the way) double-check the line slant before they walk away. Wait, what about animal damage? Oh man, rodents and birds love to make homes in outdoor refrigeration units. Squirrels chewed through a refrigerant line for a customer last year, and by the time they noticed, all the refrigerant was gone, and the food in their walk-in spoiled. How to prevent that? Use animal-resistant line covers— they’re metal or heavy plastic, so rodents can’t chew through them. Also, plug any gaps in the unit’s base or sides that are bigger than a quarter, so birds or mice can’t get inside. I even recommend putting a small wire mesh screen over the air intakes, just to keep bugs and small critters out, as long as it doesn’t block airflow. Another thing I rarely hear people talk about: vibration. Refrigeration units vibrate when they run, right? If they’re sitting directly on concrete, that’s fine, but if they’re on a wooden deck or a flimsy platform, the vibration can loosen bolts, crack refrigerant lines, or even make the unit shift. I always recommend using vibration pads— thick, rubber pads that go between the unit and the pad or deck— to absorb vibration. They’re cheap, like $20 for a set, and they save you from a lot of headaches down the line. Now, let’s talk about regular checks, because precautions don’t stop on install day. I tell every customer to do a quick monthly check, and a deep clean every quarter. The monthly check: look at the drainage area to make sure there’s no puddling, check the condenser fins for debris, make sure the canopy or cover isn’t damaged, and listen for any weird noises— a hissing sound could be a leak, a rattling could be loose parts. The deep clean: gently brush the condenser fins with a soft brush (or a fin comb, if they’re really bent) to get rid of dust and debris, check the line insulation for tears, and test the disconnect switch to make sure it works. In the first year, I also do a free follow-up visit (for any customer who buys from me) just to make sure everything’s running right, no hidden issues. Wait, and one last big one: don’t overload the unit. A lot of people think “bigger is better” when installing an outdoor unit, but if you get one that’s way too big for the space it’s cooling, it’ll cycle on and off too often, which wears out the compressor faster. That’s a mistake I see all the time— someone buys a cheap big unit to save money upfront, and within 2 years, it’s dead. When I consult with customers, I always ask for the size of the space they’re cooling, how many door openings they have, the ambient temperature around the space, and even how often they open the doors— that helps pick the right unit. Look, I get it— installing an outdoor refrigeration unit can feel overwhelming, especially if you’ve never done it before. But skipping these precautions isn’t worth the cost of emergency repairs, spoiled product, or a whole new unit every few years. The good news is, most of these steps are pretty simple, and if you take the time to do them right, your unit will run smoothly for 10+ years, which saves you a ton of money in the long run. If you’re planning an install, or you’re not sure if your current outdoor unit is set up right, don’t guess— reach out. I’m here to help you figure out the right site, the right protection, and make sure everything goes off without a hitch. No pushy sales stuff, just honest advice from someone who’s been in this game long enough to know what works. When it comes to refrigeration units, outdoor installs don’t have to be a nightmare— you just need to pay attention to the details. Skip the shortcuts, follow these precautions, and you’ll be golden. References: ASHRAE. (2022). HVAC Applications Handbook: Refrigeration for Food and Beverage Systems. American Society of Heating, Refrigerating and Air-Conditioning Engineers. Energy Star. (2021). Outdoor Commercial Refrigeration Unit Installation Best Practices. U.S. Environmental Protection Agency. National Electrical Manufacturers Association. (2020). Safety Standards for Outdoor Commercial HVAC-R Installations. NEMA. Refrigeration Unit
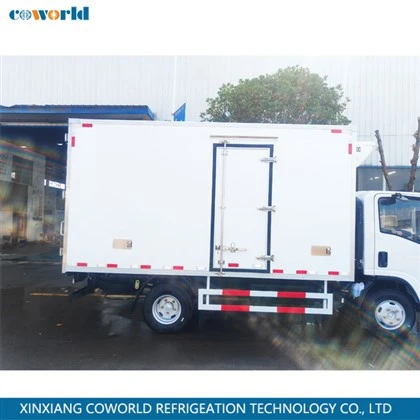
Xinxiang Coworld Refrigeration Technology Co., Ltd.
As one of the most professional refrigeration unit manufacturers and suppliers in China, our products have good reputation in the market. We warmly welcome you to buy cheap refrigeration unit for sale here from our factory. If you have any enquiry about cooperation, please feel free to email us.
Address: B103 ROOM, GT CITY, NO.199 ZHENGZHONG ROAD, HIGH TECH ZONE, XINXIANG CITY, HENAN PROVINCE, CHINA
E-mail: coworldfrio@hotmail.com
WebSite: https://www.coworldthermo.com/
