Hey everyone, Paper Carrier Tape
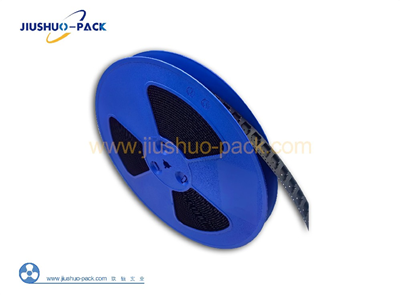
If you’re working in electronics assembly or surface-mount tech (SMT), you’ve definitely seen paper carrier tape floating around your production floor. As someone who’s been in the paper carrier tape game for over 8 years now—supplying these things to small assembly shops and big OEMs alike—I’ve seen way too many people skip the small steps when installing it on their pick-and-place or packaging machines. And yeah, I get it—installing tape might seem like a no-brainer, but mess it up, and you’re looking at feeder jams, part misfeeds, and wasted time that could be spent hitting production targets. Today, I’m walking you through exactly how to do this right, from pre-install checks to the final test run, no fancy jargon, just real, hands-on tips I’ve picked up from dealing with both frustrated assemblers and well-oiled lines.
First off, let’s talk about why paper carrier tape is different from the plastic stuff. Paper’s a bit more forgiving for certain applications (like sensitive semiconductors or components that need to “breathe” to avoid condensation) but it’s also way easier to crumple if you’re rough with it. That’s why the install steps matter more here than with plastic—one wrong move, and you’re tossing a whole roll of tape before you even use half of it. I’ve had customers call me panicking at 2 PM because they jammed a feeder and lost an hour of production, and 9 times out of 10, it came down to skipping a pre-install check I’m gonna mention next.
Let’s start with prep work, because rushing prep is where most mistakes happen. Before you even touch your machine, grab the new roll of paper carrier tape you got from us (or any supplier, but hey, ours is engineered for consistent tension) and do a quick visual check. Hold the roll up to the light and look for any crimps, edge tears, or uneven perforations—those tiny holes along the edges that feed into the machine’s sprockets. If the perforations are off, the tape will skip the sprockets, and you’ll get parts that either don’t feed at all or get pulled too hard and pop out of the pockets. Also, check the tape’s direction—paper carrier tape has a “head” and “tail.” The head is the end that’s already loaded with dummy components (those little empty or test parts that keep the first real components aligned) and it’s marked with a tiny notch or a yellow strip. If you load it backwards, the dummy end will be going into the wrong side of the feeder, and you’ll be fighting misfeeds from the get-go.
Next, prep the machine itself. Shut off the feeder power? No, wait—most modern SMT feeders run on a small battery or the machine’s logic, and shutting it off can reset settings, which is a headache. Instead, just pull the tape advance lever halfway, so the sprockets aren’t spinning freely. Wipe down the feeder’s path with a lint-free cloth—paper gets dusty, and if there’s leftover adhesive from a previous plastic tape run or metal shavings, it’ll catch on the paper’s edge. Pro tip: if your feeder has a tension wheel, make sure it’s clean too. That wheel applies pressure to keep the tape from slackening, and if it’s gunked up, it’ll either grip too hard (crumpling paper) or too soft (slack, misfeeds). Also, check the sprockets—make sure none of the teeth are bent. A bent sprocket tooth will tear the perforations as you feed the tape, so if you see any damage, grab a spare sprocket before you start. I always keep a handful of spare sprockets in my toolbox, just in case—way better than dealing with a mid-install breakdown.
Okay, time to load the tape. This is the part I see people mess up the most, so pay attention. First, thread the tape through the feeder’s upper guide first, right where the tension wheel is. Make sure the tape sits flat in the guides—no twisting, no bunching. Once it’s through the upper guide, line up the perforations with the sprockets. Most feeders have a small window where you can peek to make sure each sprocket tooth is snuggled into a perforation, not sitting on the paper itself. If you force the sprockets onto the tape, you’ll bend the teeth or tear the perforations, so take it slow here. I’ve had customers yank the tape forward to “speed up” this step and end up with a roll that’s half ruined. Do it slow, gently, lining each sprocket tooth up as you go.
Once the sprockets are engaged, run the tape under the tension roller. This is key for paper—don’t crank the tension all the way like you would for plastic tape. Paper is thinner and more flexible, so too much tension will stretch the tape, making the pockets miss the nozzle on your pick-and-place. Set the tension to about medium—you should be able to press the tape gently with your fingertip and it gives just a little, not crumples. If it doesn’t give at all, it’s too tight; if it sags, it’s too loose. Adjust that tension wheel slowly, one quarter turn at a time, until it’s just right.
Now, feed the tape down to the take-up reel. The take-up reel’s job is to wind up the empty cover tape (wait, hold on—did I forget cover tape? Oh right, paper carrier tape uses a paper or plastic cover tape sealed over the pockets to hold components in. Make sure you have the correct cover tape for your carrier—our paper carrier tape works with either paper cover (for eco-friendly runs) or static-dissipative plastic cover for sensitive parts, so double-check that you’re matching them up. Back to take-up: attach the empty cover tape (or the end of the used cover tape from the previous run) to the take-up reel’s holder. Most take-up reels have a small tab or slot that you slide the tape into, then tighten the holder so the tape doesn’t slip. Here’s another pro tip: leave about 3-4 inches of tape hanging between the feeder’s exit and the take-up reel. If you load it too tight, when the take-up starts winding, it’ll pull too hard on the carrier tape, crumpling it. That extra slack gives the tension wheel something to work with, so the tape feeds smoothly.
Almost there—now you need to seat the leading edge of the tape into the machine’s pick-and-place nozzle path. Advance the feeder slowly (use the machine’s manual advance function, not a hand crank—hand cranks can be too jerky) until the first real component is sitting under the nozzle’s stop position. Check that the component is centered in the pocket—if it’s shifted, it’ll get picked up wrong. Also, pull back the cover tape leading edge a tiny bit, so it’s not blocking the nozzle. Wait, cover tape removal: some feeders peel the cover tape automatically, but if yours is manual, peel it back at a 45-degree angle, not straight up. Peeling straight up can pull the component out of the pocket, especially small surface-mount resistors or capacitors. 45 degrees gives the cover tape room to peel without disturbing the part.
Now, the test run. This is non-negotiable. Don’t just hit “run” and walk away. Do a 10-cycle test: advance the tape 10 times, check each component as it comes under the nozzle. Look for misfeeds (component not in the pocket), crumpled tape, torn perforations, or components that are tilted or shifted. If you see any issues, stop immediately. The most common fixes here are adjusting the tension wheel (if tape is crumpling, loosen tension; if parts are misaligning, tighten a little), or checking if the perforations are slipping on the sprockets (you might need to re-line up the sprockets). I once had a customer who loaded the tape with the tension too high, and the first 20 components were all misaligned—we adjusted it, and the line ran smooth for the rest of the shift. No more downtime.
Wait, one more thing—storage, because even if you install the tape right, bad storage will mess it up. Paper carrier tape absorbs moisture, which makes it warp or tear. If you’re not using a roll, keep it in its original sealed bag until you need it. We add a desiccant packet in all our rolls for that exact reason. If you leave a roll out for more than 24 hours, especially in a humid environment, you might get warped tape that feeds unevenly. That’s a quick win to avoid headaches—don’t leave rolls sitting on the shelf open.
At the end of the day, installing paper carrier tape isn’t rocket science, but it’s all about the small details. Rushing the pre-checks, cranking the tension too high, or peeling the cover tape at the wrong angle—those are the things that kill production. And if you’re using our tape (or any reputable supplier’s), make sure you’re getting the right specs—pocket size, perforation pitch, static protection—because mismatched specs will cause issues no matter how good your install is.

If you’re struggling with a feeder jam, or you’re not sure if you got the right tape for your application, hit us up to talk. We’re not just a supplier—we’re in this with you, making sure your line runs as smooth as possible. No automated sales pitches, just people who know paper carrier tape inside and out, ready to answer your questions. Don’t waste time dealing with misfeeds—reach out, and we’ll get you sorted.
Reel and Tape Packaging Machine References:
- Surface Mount Technology Association (SMTA). “Best Practices for Tape and Reel Handling in Electronics Assembly.” 2022.
- Paper Carrier Tape Manufacturers Association (PCTMA). “Technical Guide to Paper Carrier Tape Installation and Maintenance.” 2021.
- International Electrotechnical Commission (IEC). “Standard 60068-2-78: Environmental Testing for Electronic Components – Part 2-78: Test Cab: Damp Heat, Steady State.” 2020.
Dongguan Jiushuo Industrial Co., Ltd.
As one of the most professional paper carrier tape manufacturers and suppliers in China, we also support customized service. Please feel free to buy high quality paper carrier tape made in China here from our factory. Contact us for more details.
Address: 11th Floor, Building 2, Chuangfu Center, Chashan Town, Dongguan City, Guangdong Province, China
E-mail: sales06@zaidaiw.com
WebSite: https://www.carriertape-pack.com/
