If you’ve ever stood in front of a stalled brush trimming machine in the middle of a production run, you know how quickly a small issue can snowball into lost time, delayed orders, and frustrated team members. As someone who’s spent over a decade supplying brush trimming machines to manufacturers ranging from small household brush brands to large industrial cleaning equipment producers, I’ve fixed my share of field problems—and walked dozens of operators through troubleshooting steps that got their lines back up without calling for emergency service. Today, I’m sharing the systematic, hands-on troubleshooting process I walk every customer through, tailored to the machines we build, so you can diagnose and fix common issues before they become headaches. Brush Trimming Machine
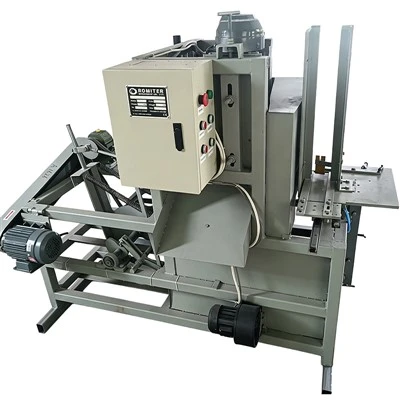
The first rule of troubleshooting any piece of machinery—especially a brush trimmer, which relies on precise cuts, consistent feed, and synchronized moving parts—is to start with the basics before diving into complex electronics or mechanical disassembly. I see this mistake all the time: operators panic when the trimmer sputters and immediately start checking the control board or replacing blades, when the real problem is a loose air fitting or a bit of debris caught in the feed roller. So my first step is always to do a quick “pre-check” of the machine’s most exposed, easy-to-forget parts.
Let’s start with power and air supply, because even the most advanced control system can’t function if it’s not getting what it needs. For most of our brush trimming machines, especially our standard and heavy-duty models, power is 240V single-phase or 480V three-phase, and pneumatics run at 90-100 PSI. If your machine isn’t turning on at all, check the circuit breaker first—look for tripped breakers in the main electrical panel or on the machine’s control cabinet, which is a common issue when a line is under heavy load. For pneumatics, a pressure gauge on the machine’s side will show if you’re below the 90 PSI minimum; if you are, check the air compressor, any in-line filters, and the quick-connect fittings that hook to the machine’s air lines. I once had a customer in Ohio call at 7 a.m. panicking because their trimmer wouldn’t feed, and it turned out their shop’s air compressor had tripped overnight—no mechanical parts needed replacing, just a quick restart of the compressor. That’s the kind of easy fix you catch before moving further.
Next in the pre-check is debris and general wear and tear that builds up during production runs. Brush trimmers cut nylon, polyester, and natural bristles, so tiny shavings and loose fibers can get everywhere: in the feed rollers, under the cutting head, in the sensor slots, and even inside the control cabinet’s ventilation filters. Every four hours of operation, we recommend operators do a quick “wipe down” with a soft brush and compressed air (on low pressure, to avoid damaging parts) to clear debris. If your trimmer is making unusual noises—squealing, grinding, or clicking—the first place I tell people to look is the cutting area. Turn off the machine, unplug it, and make sure it’s completely stationary, then open the guard over the cutting head. Look for loose bristles stuck between the upper and lower cutter blades, or wrapped around the blade shaft. For example, when trimming toilet brush heads, stiff nylon fibers have a way of wrapping around the cutter drive shaft, causing it to seize or wobble, which leads to uneven cuts. A quick cleaning with a pair of pliers to remove wrapped fibers, and a light wipe of the blades with a lint-free cloth to remove built-up resin, will often fix the issue.
Once you’ve ruled out the basics, move to the most common functional issues our customers report, grouped by symptom, since that’s the easiest way to diagnose problems with a running or partially running machine.
First symptom: uneven or rough cuts on the brush tip. This is one of the most frequent complaints, and it’s almost always tied to either blade condition or feed consistency. Let’s start with blades: our trimmers use high-carbon steel or carbide-tipped blades, depending on the model, and even the best blades will dull over time, or get nicked if a foreign object (like a loose bristle tuft or a piece of wire from a metal-handled brush) makes its way into the cutting area. To check blade condition, remove the blade guard and inspect both the upper and lower blades. If you see small nicks along the cutting edge, or the edge looks dull instead of sharp, it’s time to replace or resharpen them. A general rule of thumb from our engineering team: carbide blades should last 100-120 hours of operation for synthetic bristles, and 50-70 hours for stiffer natural bristles, so if you’re hitting that mark, don’t wait for a bad cut to replace them—proactive blade changes reduce downtime.
If the blades look good, the next culprit is the feed mechanism. The feed roller is what pulls the brush core into the cutting head at a consistent speed, so if the roller is dirty, worn, or misaligned, the brush will be pulled unevenly, leading to crooked cuts. To check the feed roller, turn the machine on manual mode (most of our trimmers have a manual override for single parts) and run a test brush through. Watch how the roller grips the core—if it slips or skips, that means there’s not enough tension on the roller. Adjusting the tension bolt on the side of the roller (we include clear instructions in the operator’s manual) usually fixes this, but if the rubber coating on the roller is cracked or worn, you’ll need to replace it. I had a customer in Mexico who was seeing 15% of brushes being rejected for uneven cuts, and after checking blades, we found their feed roller’s rubber coating had worn down to the metal, so it couldn’t grip the thin plastic brush cores they were using. Replacing the roller took 10 minutes, and their rejection rate dropped to less than 1%.
Second common symptom: the machine stops mid-cycle or the sensor triggers an error code. Modern brush trimming machines use photo eyes or contact sensors to detect the position of the brush core, making sure the cut is at the right place. If the sensor is blocked, dirty, or misaligned, it will trigger a stop, even if there’s nothing wrong with the rest of the machine. First, pull up the error code on the control panel—most of our machines display a 2 or 3 digit code that corresponds to a specific sensor issue, like a “S1 error” for the feed sensor or “S2 error” for the cut sensor. If you don’t have the manual handy, our customer service team can look up the code in 2 minutes, but here’s how to diagnose it on your own: turn off and unplug the machine, then locate the sensor along the feed path. For photo eyes, which are the most common type we use, you’ll see two small parts: an emitter that sends a beam of light, and a receiver that catches it. If either lens is dusty or covered in bristle shavings, that will block the beam, causing the sensor to fail. Gently wipe both lenses with a cotton swab dipped in isopropyl alcohol, making sure not to scratch the delicate surface. Then test the machine in manual mode to see if the sensor works. If the error comes back, the sensor may be misaligned—loosen the mounting screw, adjust the emitter and receiver until the beam lines up (you can test this by holding a small piece of paper between them to see if the receiver triggers), then tighten the screw. Rarely, a sensor will go bad after heavy use, but 9 times out of 10, it’s just a dirty lens. I once got a frantic call from a customer in Canada at 10 p.m. during holiday rush, and when I walked them through checking the sensor lens, they realized a single piece of white bristle had blown into the receiver during cleaning earlier that day—all it took was a quick wipe to get their line back up.
Third symptom: unusual noise or vibration during operation. A trimmer that’s making more noise than usual isn’t just annoying—it’s a sign that something is wearing or misaligned, and if left unaddressed, it can lead to expensive part failure. The most common cause of vibration is loose bolts or fasteners, especially on the cutter head and motor mount. Before doing anything else, turn off the machine and inspect all the bolts around the cutting head, feed roller, and motor. A loose cutter head bolt is a big one—if the head wobbles, it will cause uneven cuts and excessive vibration, so tightening that (and locking it with a thread locker if needed) is a quick fix. If the vibration persists, check the motor’s belt: our trimmers use timing belts to sync the feed roller and cutter head, and if the belt is stretched, cracked, or misaligned, it will cause vibration and inconsistent speed. To check the belt, remove the belt guard, run the machine for 10 seconds, then turn it off and feel the belt—if it’s hot or has glazed spots, it’s time to replace it. If the belt looks fine, it may be misaligned on the pulleys, which is just a matter of adjusting the motor’s position to get proper tension.
For more persistent issues, like cuts that are too short or too long, or the machine’s speed is inconsistent, the problem is usually in the machine’s settings, which we intentionally made easy to adjust for operators. The control panel on all our trimmers has a “trim length” setting that allows you to input the exact length you want the brush tip to be. If your cuts are off, double-check that the trim length setting matches what you need, then run a test brush. If it’s still off, check the encoder on the feed roller, which tracks how far the roller has moved the brush core. If the encoder is dirty or misaligned, it will send the wrong signal to the control panel, leading to inconsistent cut lengths. Cleaning the encoder’s slot with compressed air and adjusting its alignment usually fixes this.
Now, I know what you’re thinking: “What if none of this works?” Every machine will have rare issues, from a faulty control board to a worn motor, and that’s why we build our trimmers with replaceable, affordable parts and offer 24/7 support for all our customers. But the key point here is that 80% of brush trimming machine issues are fixable on-site with basic tools and 15 minutes of troubleshooting, and most of them don’t require a service technician to come out.
Here’s a quick recap I share with every new customer to keep on their shop floor: 1) Start with power/air supply (tripped breakers, low PSI, loose fittings), 2) Clear debris from feed rollers, cutting head, and sensors, 3) Check blade condition and feed roller tension for uneven cuts, 4) Wipe sensor lenses to fix error codes or stops, 5) Tighten loose bolts and belts for vibration/noise. Simple steps, but they save countless hours of downtime.
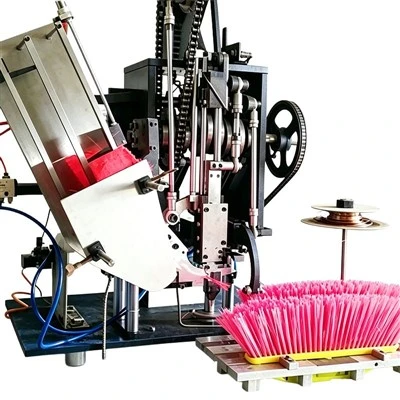
At the end of the day, our job as a brush trimming machine supplier isn’t just to sell you a piece of equipment—it’s to make sure your production runs smoothly, so you can meet your orders and grow your business. If you’re dealing with a machine that’s giving you trouble, or if you’re in the market for a new trimmer that’s built for reliability and easy maintenance, don’t hesitate to reach out to our team. We’ve worked with operators in every industry, from small boutique brush makers to large industrial manufacturers, and we’re here to help you find the right solution for your needs.
Wood Handle Making Machine References:
- Brush Manufacturing Machinery Operation and Maintenance Guide. Industrial Press Inc., 2021.
- Recommended Pressure and Maintenance for Pneumatic Industrial Equipment. OSHA Technical Manual, 2022.
- Engineering Standards for Carbide Blade Performance in Textile and Brush Trimming. American Society of Mechanical Engineers (ASME) B107.45, 2020.
Tongcheng Shengfeng Machinery Factory
As one of the most professional brush trimming machine manufacturers and suppliers in China, we’re featured by quality products and good service. Please rest assured to buy durable brush trimming machine for sale here from our factory. Contact us for more details.
Address: Shapu Village, Qingcao Town, Tongcheng City, Anhui Province
E-mail: 15955686317@163.com
WebSite: https://www.shengfengmachine.com/
